1. Select best suitable DBGW Function Block #
DBGW Function Block is Know How Protected and therefore recompiling is not possible.
Therefore 5 predefined UDTs are created:
Note: If you need a special UDT layout, please fill out Contact form or send an E-mail to Support@systemintegration.dk with your request.
DBGW1a: Max 1 record can be received from SQL database, each record can maximum consist of: 8 Booleans, 5 DINTs, 5 REALs, 5 String[40]
DBGW1b: Max 1 record can be received from SQL database, each record can maximum consist of: 8 Booleans, 10 DINTs, 10 REALs, 10 String[40]
DBGW10a: Max 10 record can be received from SQL database, each record can maximum consist of: 8 Booleans, 5 DINTs, 5 REALs, 5 String[40]
DBGW10b: Max 10 record can be received from SQL database, each record can maximum consist of: 8 Booleans, 10 DINTs, 10 REALs, 10 String[40]
DBG25a: Max 25 record can be received from SQL database, each record can maximum consist of: 8 Booleans, 5 DINTs, 5 REALs, 5 String[40]
Note: Record[0] is used for INSERT, UPDATE and WHERE clauses and therefore always available.
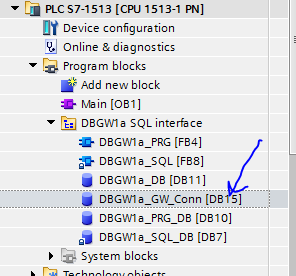
2. Add DBGW Function Block into PLC-program #
2.1 Drag and drop DBGWxn UDTs to “PLC Data Types”

2.2 Drag and drop “DBGWxxn SQL interface” to “Program blocks”

3. Configure connection to computer where DBGW Service is installed #
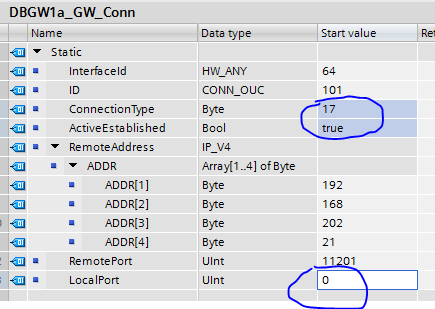
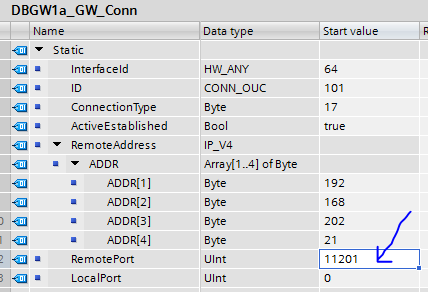
3.1 Double click on “DBGWxn_GW_Conn”
3.2 Enter InterfaceID number for used ethernet port on PLC
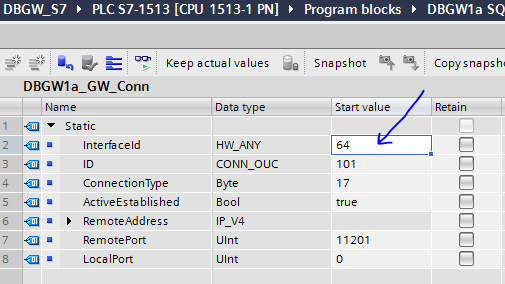
InterfaceID number can be found here:
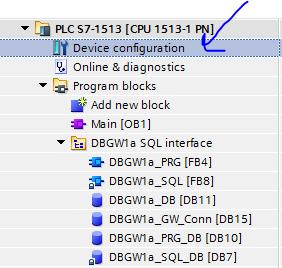
– Double click on “Device configuration”
– Double click on used Ethernet port
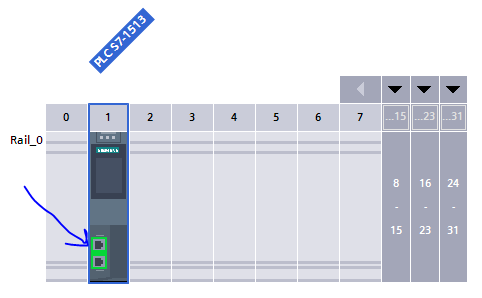
– Select “System constants”
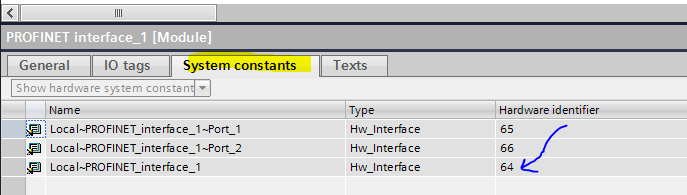
– Here you can read Hardware identifier. Value 64 is valid for port 1 & 2.
3.3 Enter unique ID number for each DBGW Function Block
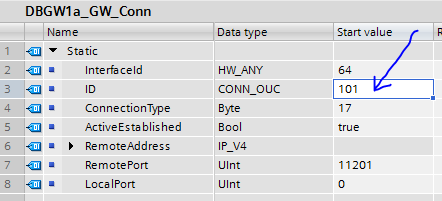
Note: If you are using more than one DBGW Function Block, each DBGW Function Block must have an unique ID number
3.4 Enter IP-Address for computer where DBGW Service is installed
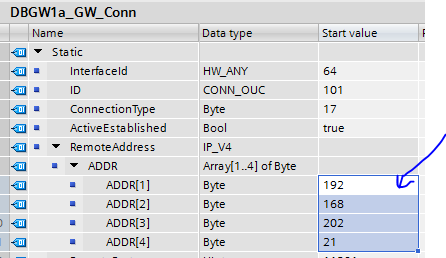
Note: Using computer name is not supported
3.5 Enter listening port for DBGW Service (Default 11201)
3.6 Don’t change these values